The dashboard is the first screen you see when you sign in. It gives you a quick read on how your outreach is performing without having to dig into any one campaign.
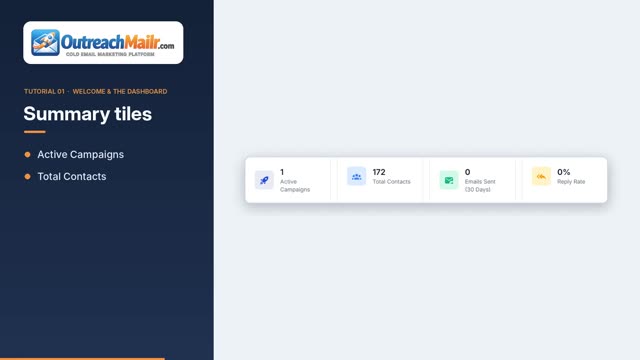
At the top, four summary tiles show your Active Campaigns count, your Total Contacts, your Emails Sent in the last thirty days, and your Reply Rate for the same window.
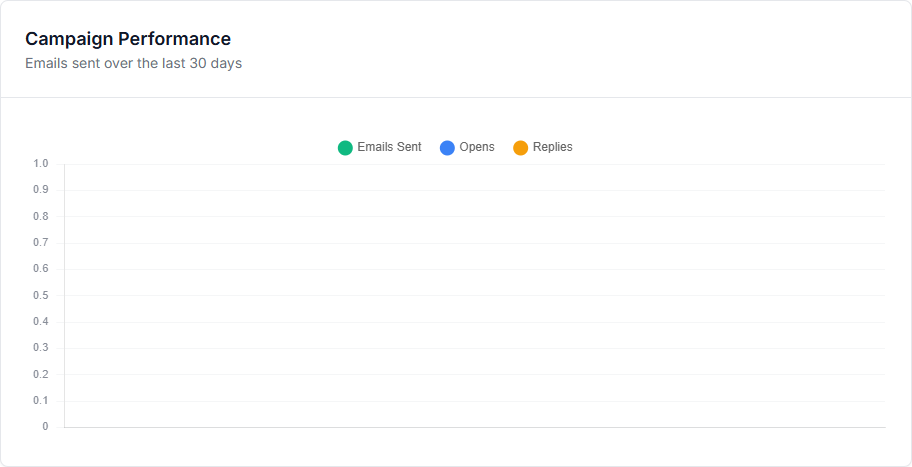
Below the tiles, the Campaign Performance chart plots Emails Sent, Opens, and Replies day by day across the last thirty days. If the chart is empty you simply have not had activity in that window yet.
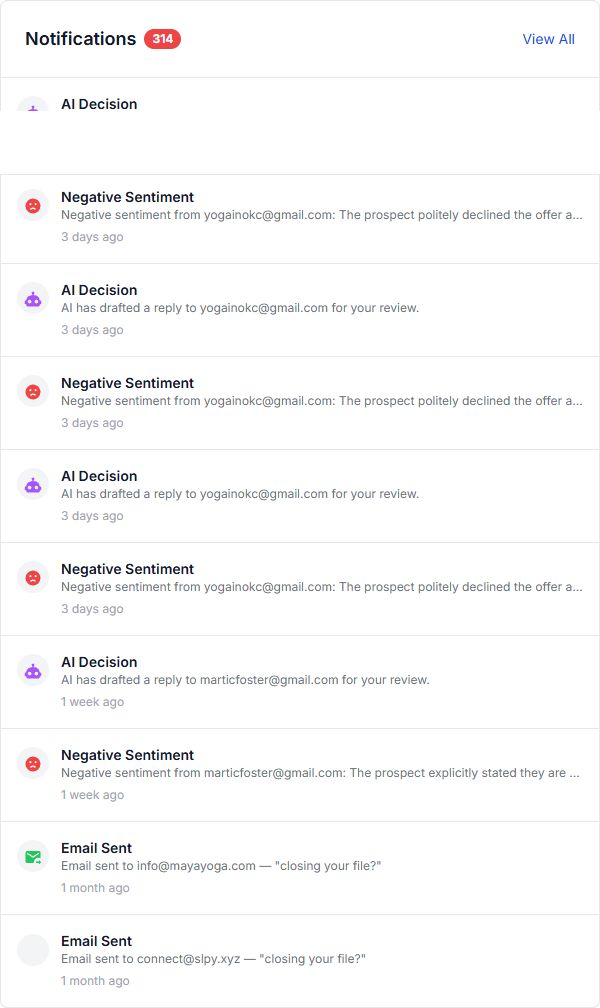
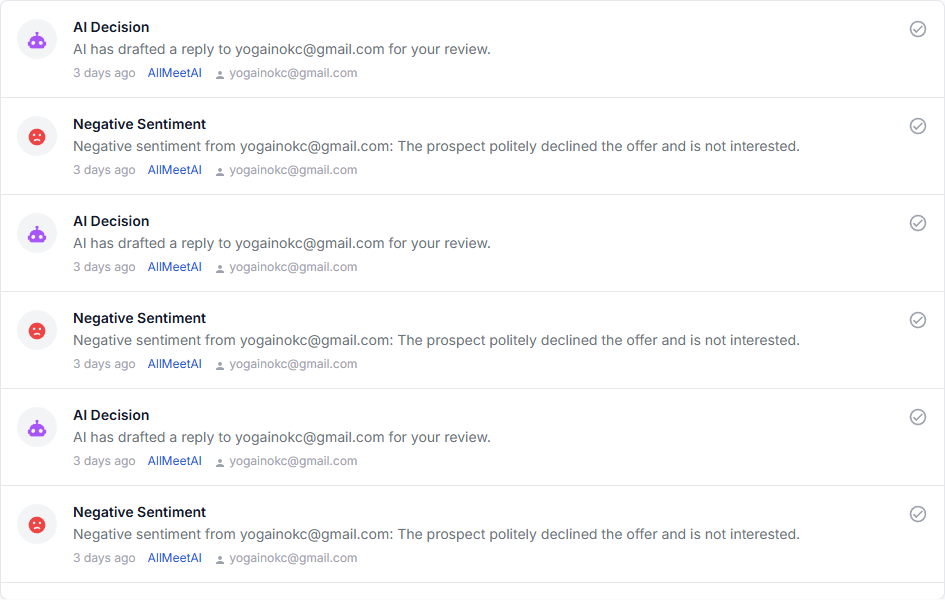
On the right side, the Notifications feed shows your most recent ten events. These are the same events you can see in the full notifications page. Each item tells you what happened, who it involved, and when. Common types you will see here are AI drafts ready for review, negative replies, unsubscribes, meeting requests, bounces, and emails sent.
From the dashboard you can also use Quick Actions to jump straight into creating a new campaign, importing contacts, or opening your inbox.
Campaigns
The campaigns area is where you set up and run your outreach. A campaign bundles together your goal, your offer, the email sequence, the contacts to reach out to, the sending account, and the guardrails you want the AI to respect.
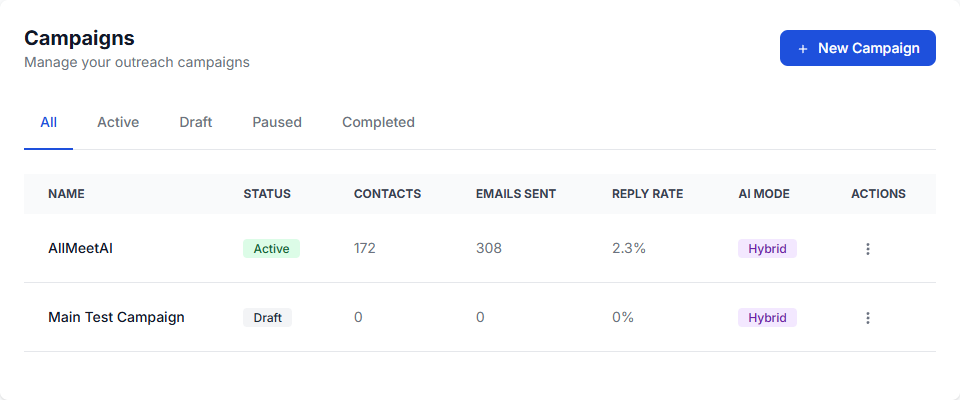
Open Campaigns from the side menu to see every campaign you have. Each row tells you the campaign name, its current status, how many contacts are in it, how many emails have been sent, what your reply rate looks like, and which AI mode is in use. Filter tabs across the top let you narrow the view to Active, Draft, Paused, or Completed.
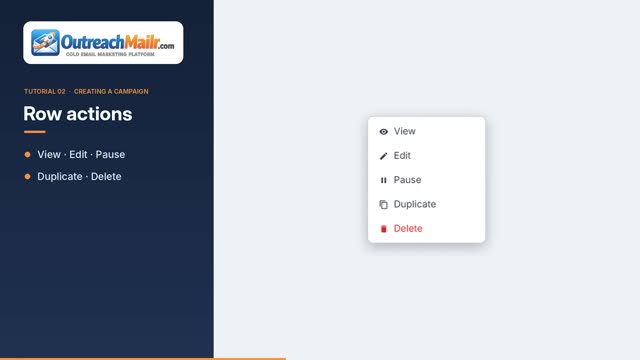
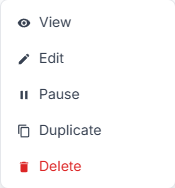
The three dot menu on each row gives you quick access to View, Edit, Pause, Duplicate, and Delete without having to open the campaign first.
Click New Campaign in the top right to start the four step wizard. If you have saved campaigns as templates before, the Use Template button at the top of the wizard lets you pre-fill everything in one click.
The four steps move you from the basics through to launch. A progress strip across the top shows where you are at any moment.
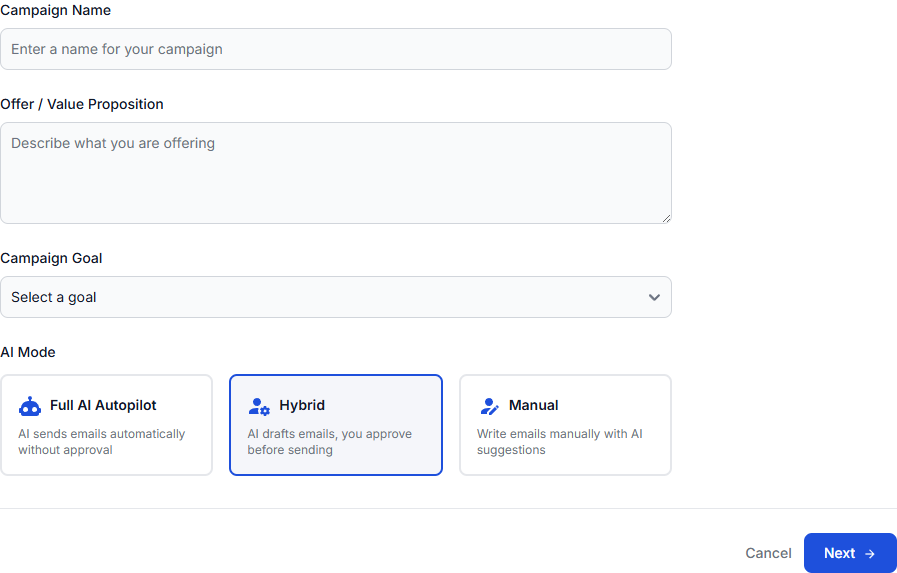
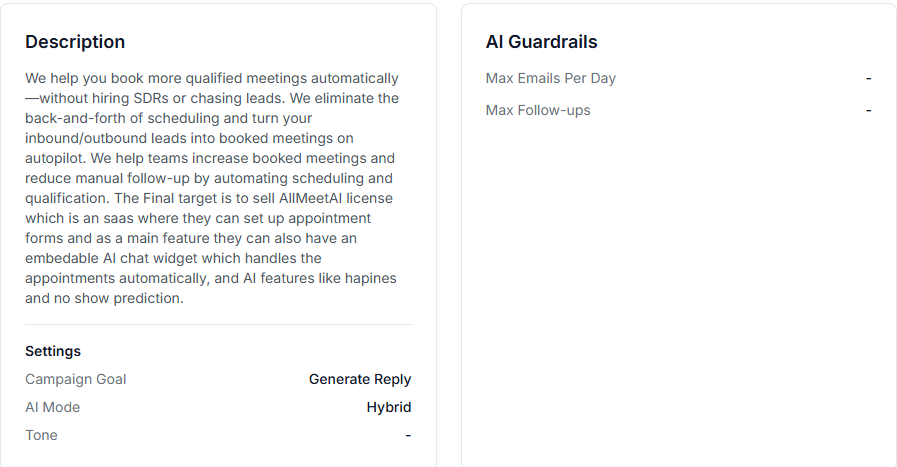
On Step 1, Basic Info, you give the campaign a name, write a short description of your offer, choose a primary goal, and pick an AI mode. The goal options are Book a Meeting, Generate a Reply, Drive Traffic, and Build Awareness. The AI mode determines how much the AI does on its own. Full AI Autopilot sends everything automatically. Hybrid drafts everything for you to approve before it sends. Manual means you write the emails yourself and the AI only personalizes and classifies replies.
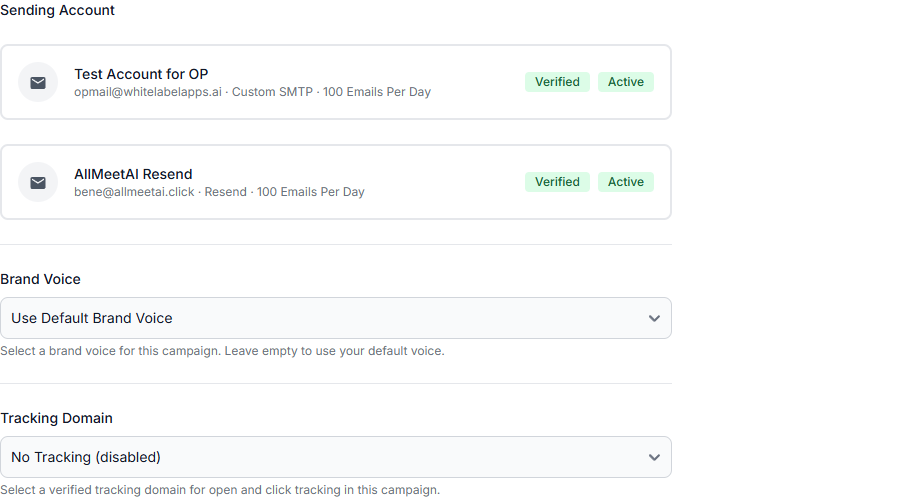
On Step 2, Sending Account, you choose which mailbox sends this campaign and optionally pick a brand voice and a custom tracking domain. Sending accounts must be verified and active to appear here.
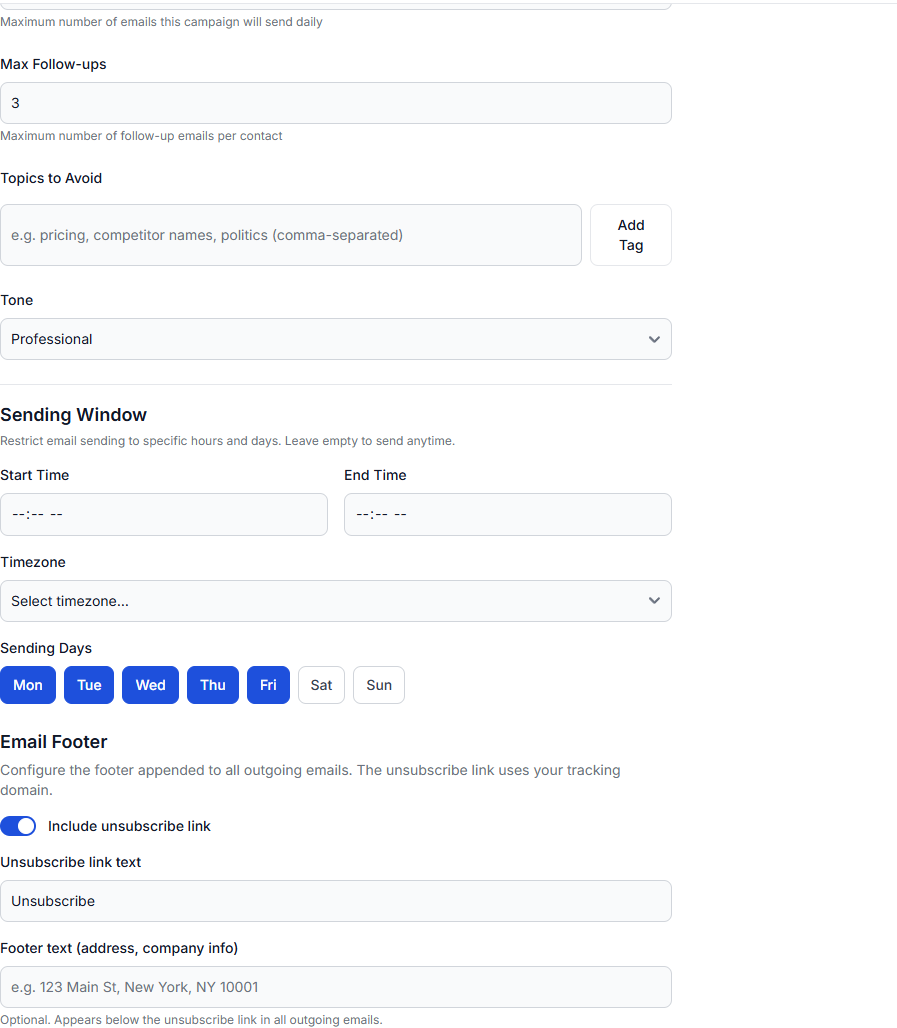
On Step 3, Guardrails and Schedule, you set the rules the AI must follow. Max Emails Per Day caps the campaign volume. Max Follow-ups limits how many follow-up emails any single contact will receive. Topics to Avoid is a free form list of subjects the AI must steer clear of. Tone sets the writing style. The Sending Window section lets you pick start and end times, a timezone, and which days of the week emails are allowed to go out. Below that, the Email Footer section controls whether outgoing emails include an unsubscribe link and what your footer signature looks like.
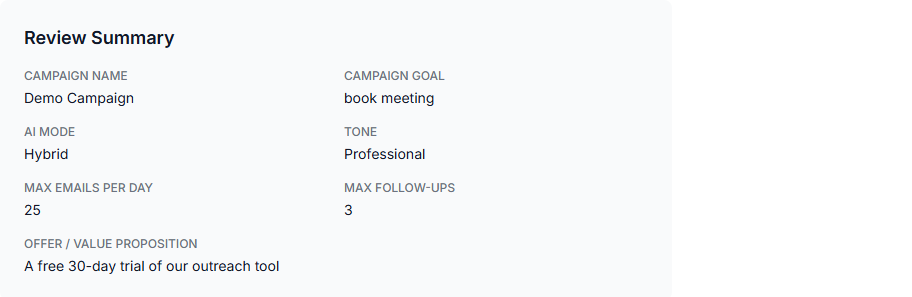
On Step 4, Review, you see a one screen summary of every choice you made. From here the campaign launches as soon as you confirm.
Video tutorial 03 Inside a Campaign & the Sequence Builder 1:45
Opening any campaign drops you on its overview. The header shows the name, the current status badge, the AI mode, and the launch date. The action buttons let you Edit the campaign, Pause sending, Duplicate the whole setup for a new campaign, Save as Template for re-use later, or Delete.
Directly below the header, four stat tiles tell you total Contacts, total Emails Sent, the Opens rate, and the Replies rate.
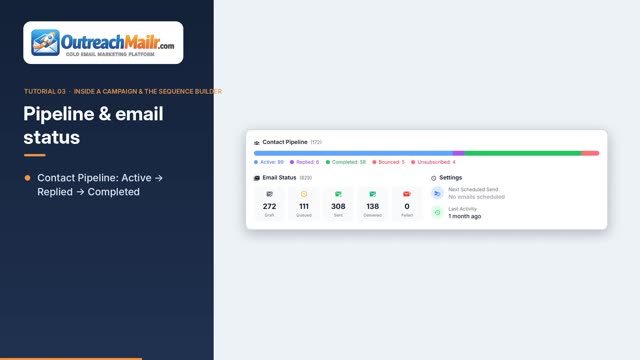
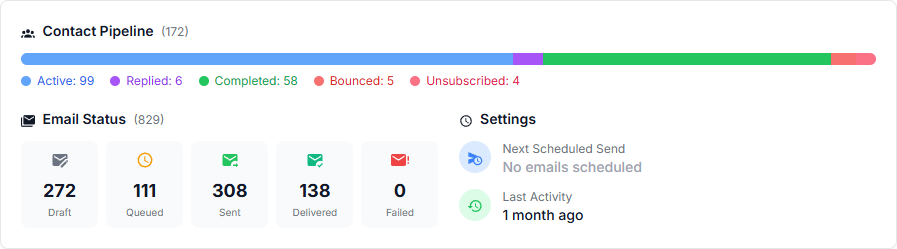
Underneath those, the Contact Pipeline bar visualizes where every contact in the campaign currently sits, from Active through Replied, Completed, Bounced, and Unsubscribed. The Email Status tiles to the right break down every email this campaign has produced into Draft, Queued, Sent, Delivered, and Failed. A small Settings panel on the far right shows when the next email is scheduled to go out and when the last activity happened.
Below all that, a tab strip lets you switch between the campaign sub-views: Overview, Activity, Contacts, Sequence, Emails, Notifications, and Analytics.
The Overview tab itself shows the campaign description, the offer copy, and a quick reference to the brand voice, sending account, and tracking domain in use.
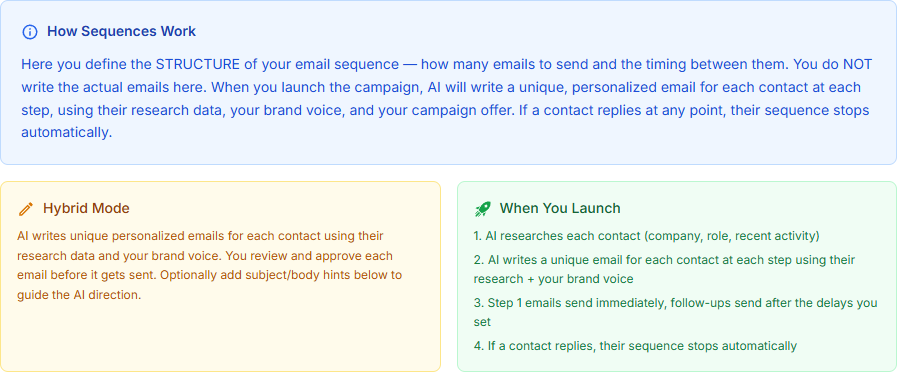
The Sequence tab is where you define the structure of your outreach: how many emails to send, what type each one is, and how long to wait between them. You do not write the actual email copy here. When you launch the campaign, the AI writes a fresh, personalized email for every contact at every step using their research data, your brand voice, and your campaign offer.
The top of the sequence page has two important buttons. Generate with AI asks the AI to propose a complete sequence based on your campaign goal. Add Step lets you insert a step manually.
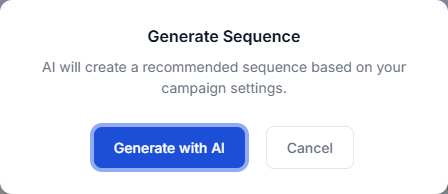
Clicking Generate with AI shows a quick confirmation before the AI proposes the steps. You can always edit anything it suggests.
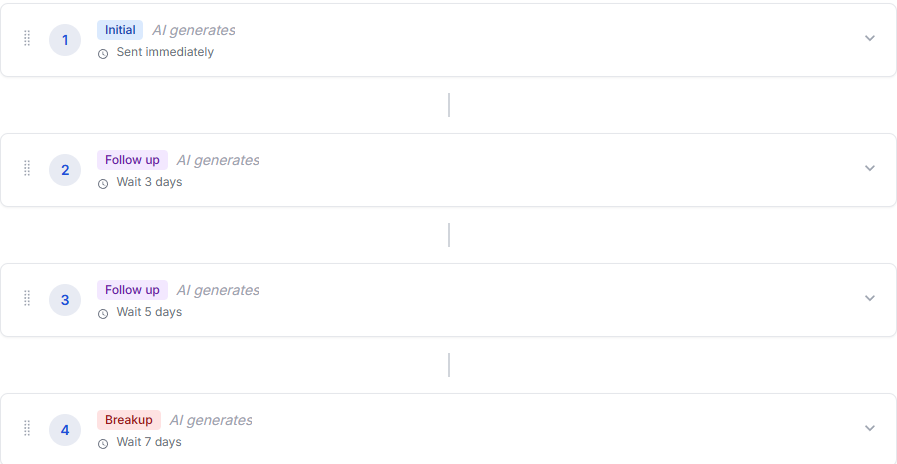
Each row in the sequence is one step. The step number and step type are shown on the left (Initial, Follow up, or Breakup), and the delay before sending is on the right. Click a step to expand it and edit the subject hint, the body hint, or change the delay.
Video tutorial 04 Reviewing Emails, Analytics & Activity 1:54
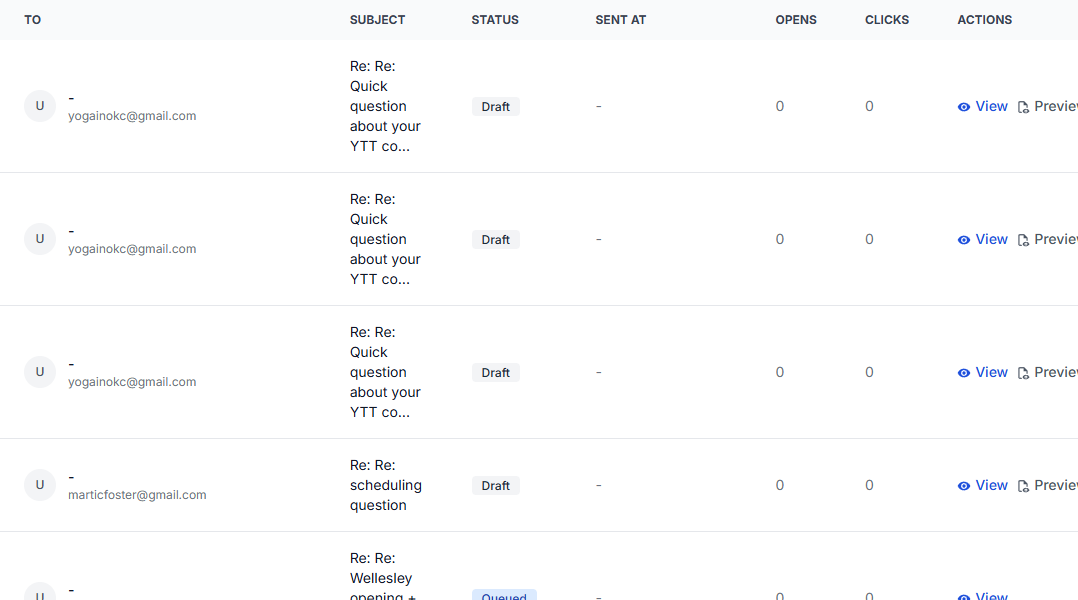
The Emails tab inside a campaign is where every individual outbound email lives, no matter what state it is in. In Hybrid mode, a banner at the top reminds you to review and approve drafts before they send.
A filter strip below the banner lets you quickly switch between All, Draft, Queued, Sent, Delivered, Failed, and Bounced emails. If you have many drafts waiting, the Approve All Drafts button in the page header lets you queue them all in one click.
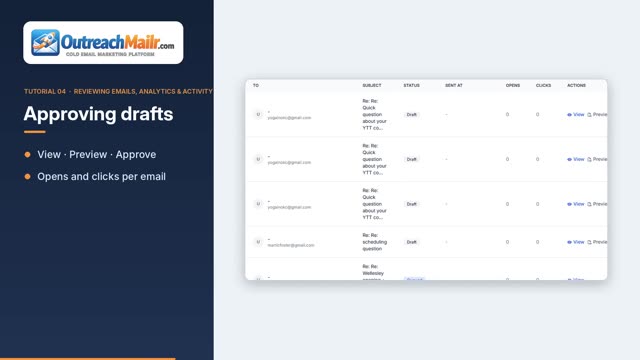
Each row in the table shows the recipient, the subject line, the status, when it was sent, how many opens and clicks it has received, and three action links: View to read the email, Preview to see how it renders, and Approve to queue a draft for sending.
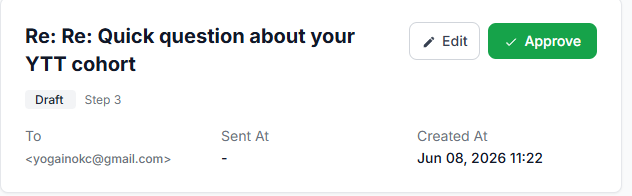
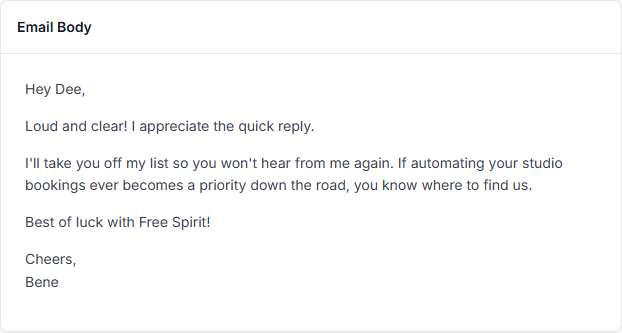
Opening a draft shows the full subject and body, who it is to, and gives you Edit and Approve buttons right at the top. You can rewrite anything in the draft before you approve it.
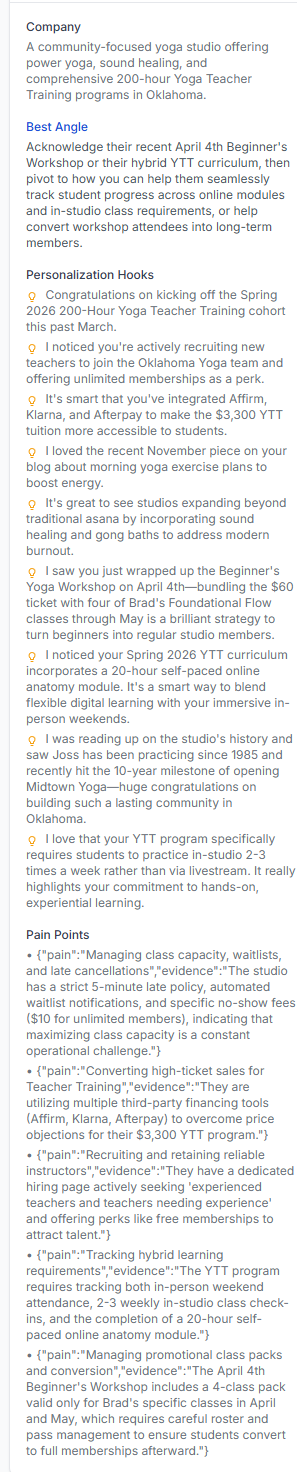
Below the email, the AI Research Data panel shows the underlying intelligence the AI used to write this specific email. You see the company background, recent news, suggested outreach angle, personalization hooks, and pain points. This is incredibly useful when deciding whether to tweak the AI's tone before approving.
The Analytics tab gives you a dedicated performance dashboard for this one campaign. At the top, a row of stat cards shows Total Sent, Delivery Rate, Open Rate, Click Rate, Reply Rate, and Bounce Rate.
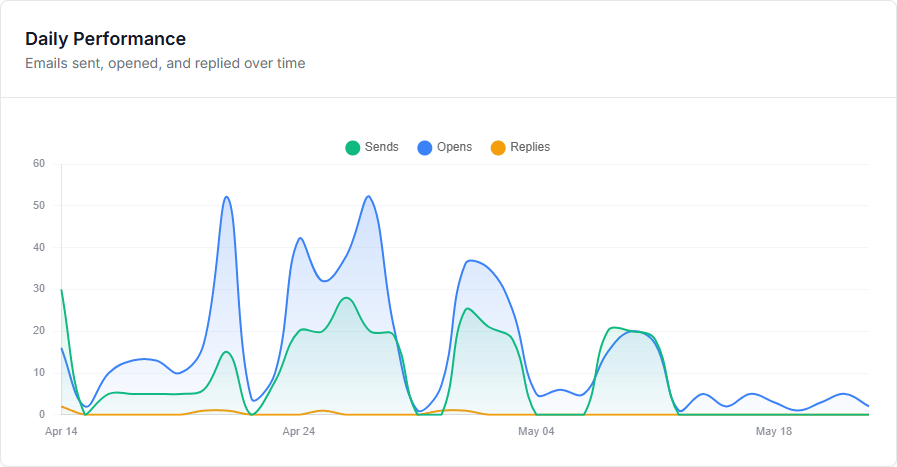
A daily performance chart below shows Sent, Opens, and Replies over time so you can spot trends and slow days.
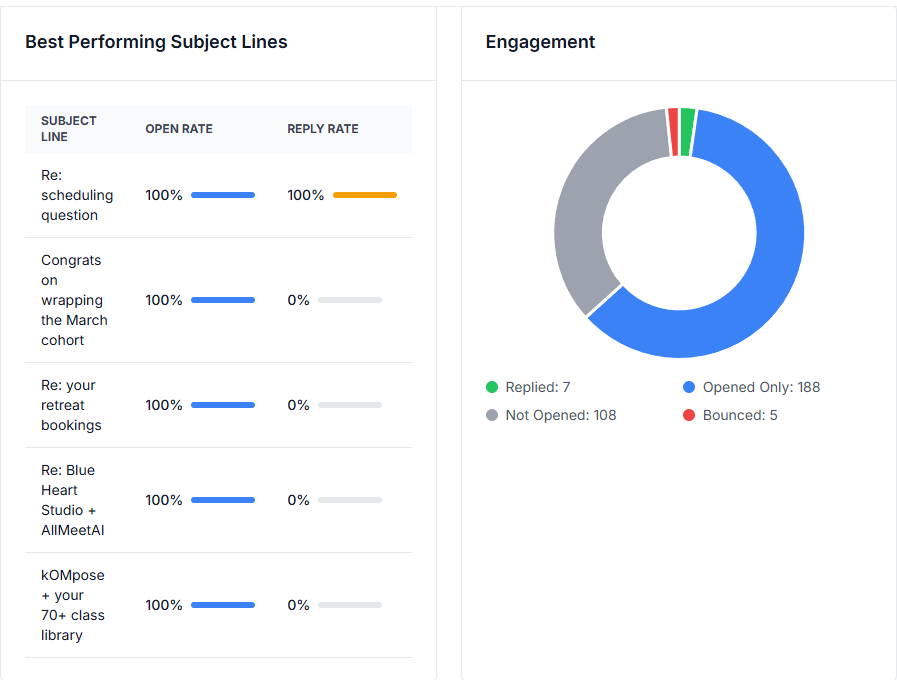
Further down, the Best Performing Subject Lines table ranks your subjects by open rate and reply rate so you learn which approaches resonate. Next to it, the Engagement donut breaks your audience into Replied, Opened Only, Not Opened, and Bounced.
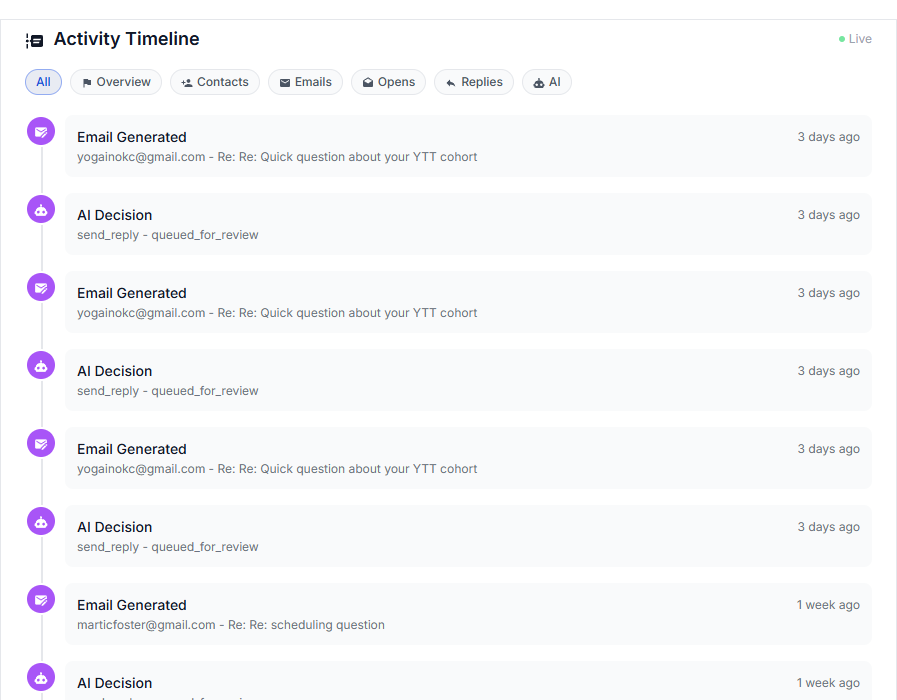
The Activity tab is a live, scrollable feed of everything happening inside the campaign right now. Emails generated, emails sent, opens, clicks, replies received, AI decisions, and status changes all appear in order. A filter strip across the top lets you narrow the feed to one type of event.
Any campaign you have built can be saved as a Template, capturing both the settings and the sequence steps. Templates live in their own area so you can browse them, delete the ones you no longer need, or use them as a starting point on the campaign wizard.
Contacts
Video tutorial 05 Contacts & AI Research 1:57
The contacts area is your prospect database. Every contact lives here regardless of whether they are in a campaign or not, and you can manage them in bulk or one by one.
The Contacts page shows your full list with quick access to Import CSV and Add Contact at the top right.
A search and filter bar lets you narrow down by keyword, change the page size, or filter by lifecycle status.
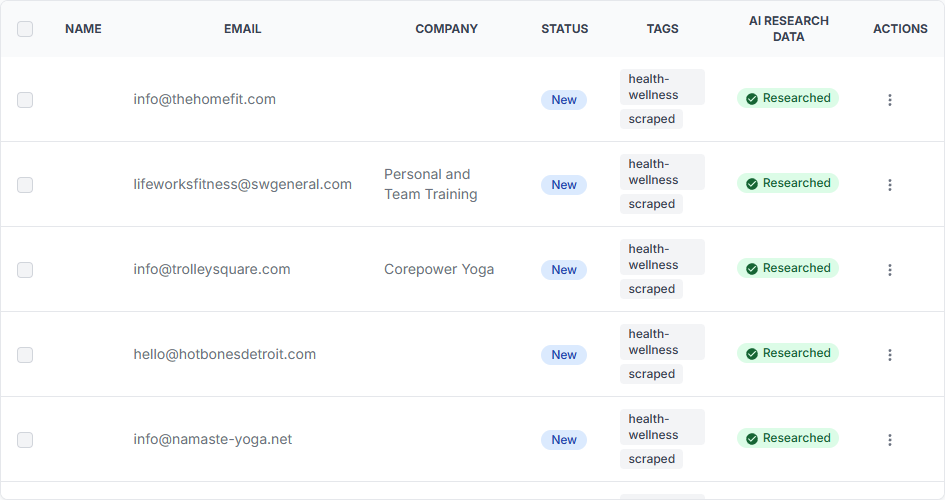
Each contact row shows the email address, the company, the lifecycle Status, any tags you have assigned, and whether the AI has researched them already. The Researched badge confirms that personalization data is on file for that contact. A three dot menu on each row gives you the per contact actions.
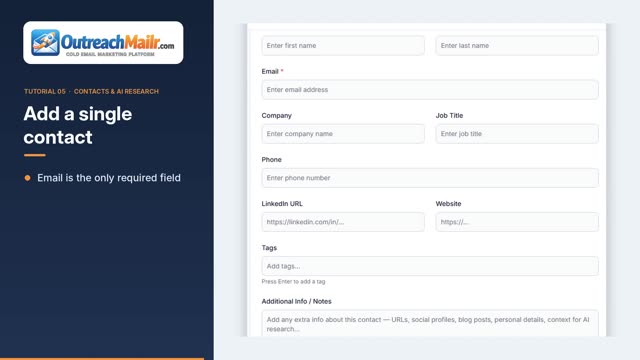
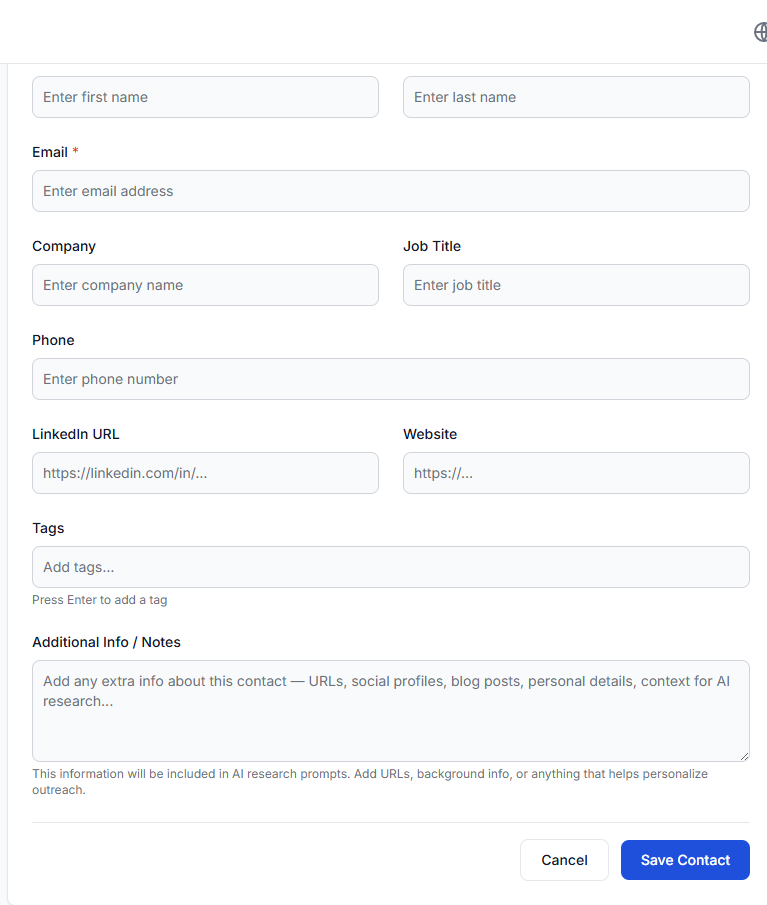
Click Add Contact to open the contact form. Email is the only required field, but the more you fill in (name, company, title, website, location, LinkedIn URL, notes, tags), the better the AI can personalize.
Click Import CSV from the contacts page to bring in many contacts at once. The import guide explains the basics of how the upload works.
A list of every field the importer accepts is shown right below. The required field is email. Everything else is optional but recommended for better personalization.
When you upload your file, you map your CSV columns to the matching contact fields, run a preview, and then commit the import. You will see a summary of how many contacts were imported, how many were duplicates, and how many were invalid.
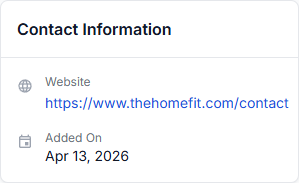
Click any contact to see their full profile. The Contact Information card shows the basics: name, email, company, title, status, tags, and the happiness score, along with quick links to Edit, Do Not Contact, and Research Contact.
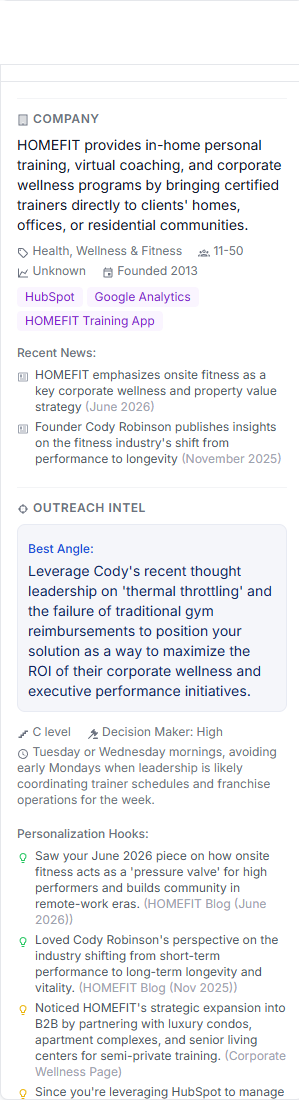
When the AI has researched a contact, the AI Research Data card on the contact detail page is where you see what it found. You get a company summary, industry, founding year, size, tech stack, recent news, recent activity by the contact (publications, podcasts, posts), and links to their public profiles.
Below that, the AI shows you the Best Angle, an explicit recommendation for how to approach this person. It also lists Personalization Hooks tagged by category and strength, the contact's likely pain points, their seniority level, and a decision maker rating. You see exactly why the AI will say what it says when it writes emails for this person.
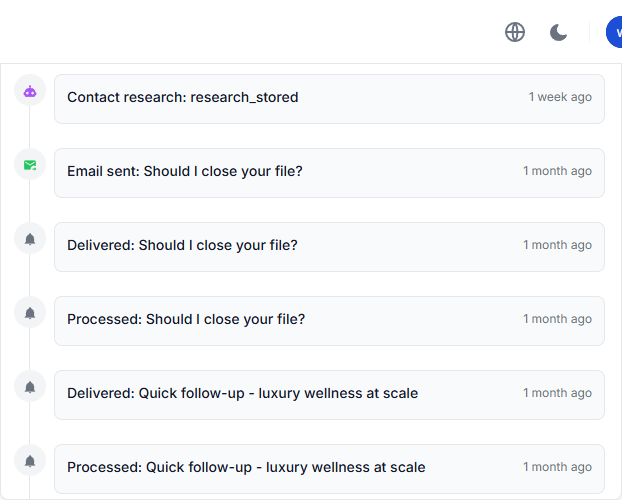
Further down the page, the Activity Timeline shows everything that has ever happened with this contact: emails sent, opens, clicks, replies, AI decisions, and campaign assignments, in a single chronological feed.
The Segments page lets you save reusable filtered views of your contact list. Create a segment by combining filters (status, tags, company, has research data, score range, creation date) and the segment shows a live count you can refresh on demand.
Inbox
Video tutorial 06 Working the Inbox 1:48
The inbox is where every reply lands and where you handle the conversation flow. It is built around the AI conversation engine, which classifies every inbound reply, drafts a contextual response, and either sends it (in Autopilot) or queues it for your one click approval (in Hybrid).
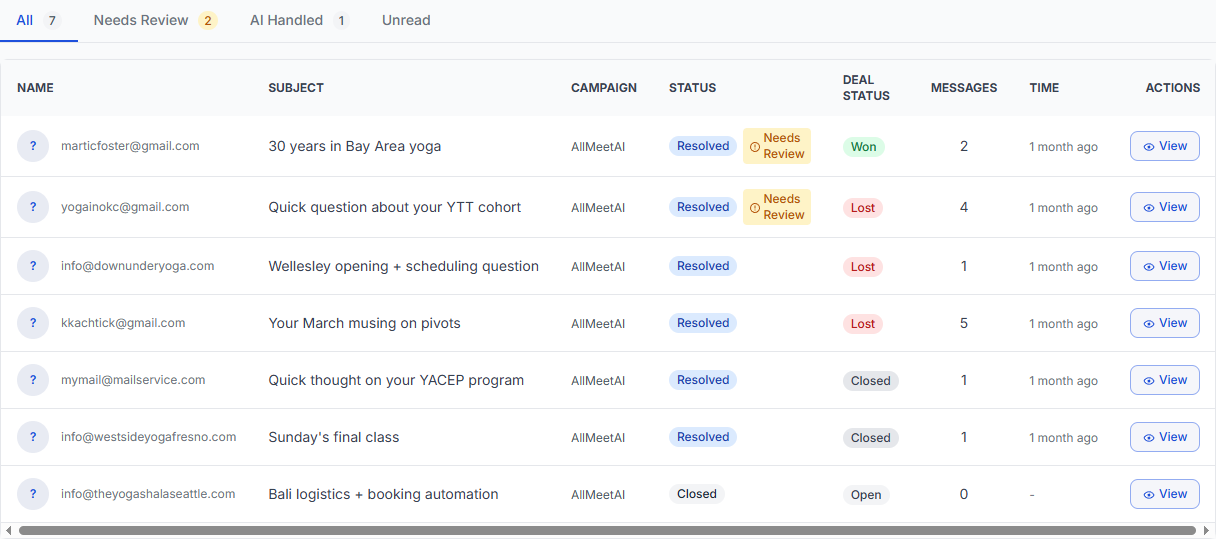
Open Inbox from the side menu. A campaign filter at the top lets you narrow the view to one campaign, and a search box lets you find a contact by name or email. Filter tabs let you focus on conversations that still Need Review, ones the AI Handled automatically, or Unread.
Each row in the list shows the sender, the subject, the campaign, the conversation status, the deal status, how many messages exchanged, and when the latest message arrived. The Needs Review badge surfaces conversations waiting on your judgment.
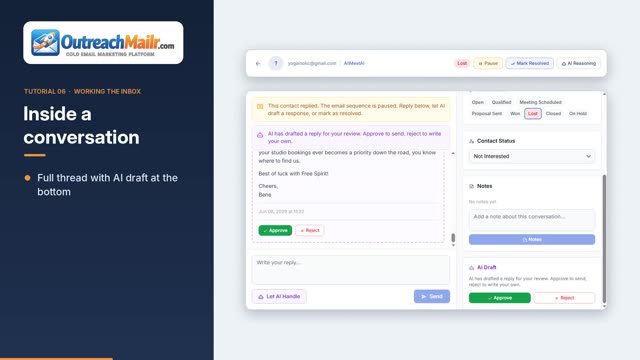
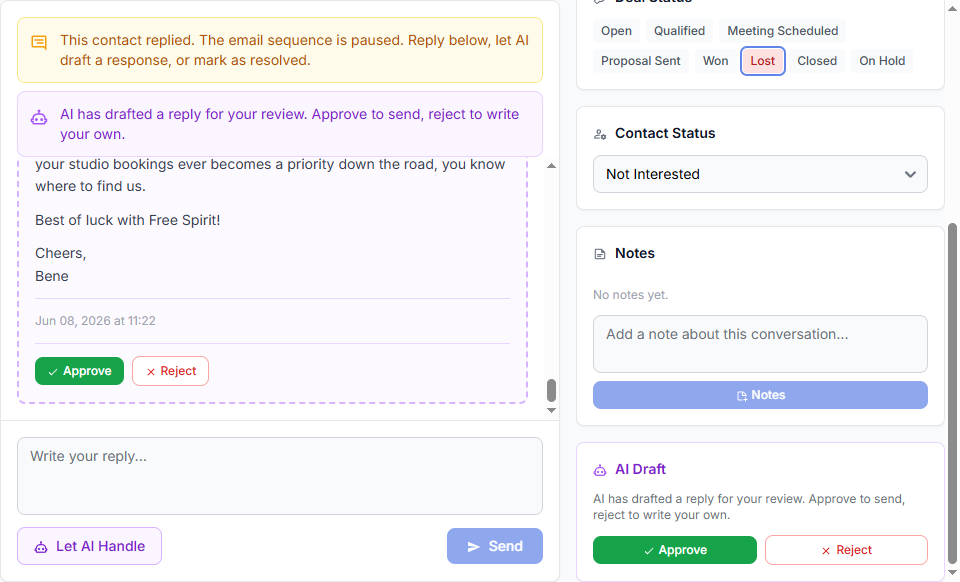
Open any conversation to see the full thread, the AI's draft (if any), and all the controls for managing the deal. The top toolbar shows the contact, the campaign, the current deal status, and quick action buttons for Pause, Mark Resolved, and AI Reasoning.
The main pane shows every outbound and inbound email in order, with the AI draft (if one exists) highlighted at the bottom. The yellow banner explains the current state, for example that the contact replied and the email sequence has paused. The purple banner alerts you when an AI draft is waiting for your decision. Approve queues the draft for sending; Reject discards it so you can write your own response in the reply box below. At the very bottom you always have the option to write a free form reply or click Let AI Handle to ask the AI to draft a fresh response on demand.
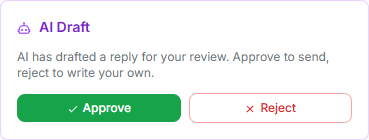
On the right side of the conversation, the AI Draft card mirrors the in-thread draft and gives you the same Approve and Reject controls in a fixed location, so you can act on the draft no matter where you are scrolled in the conversation.
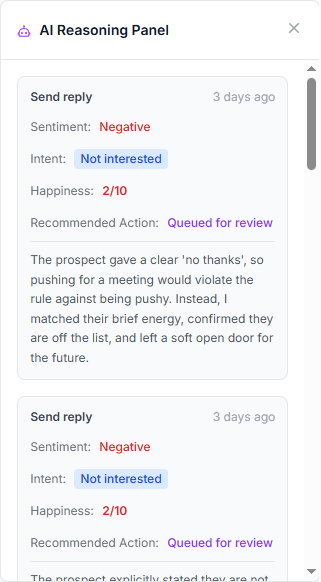
Clicking AI Reasoning in the toolbar opens a sidebar that explains every decision the AI has made on this conversation. For each decision you see the action that was taken (send reply, escalate, pause), the AI's read of the Sentiment, the detected Intent, a Happiness score out of ten, the Recommended Action, and a written explanation of why the AI chose that path. This is your audit trail.
The right hand sidebar of the conversation packs together everything you need to manage a deal. The Contact Information card at the top gives you a one click jump to the contact's full profile.
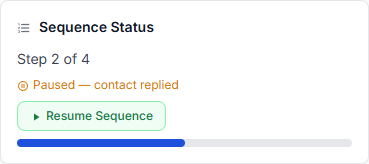
The Sequence Status card shows whether the email sequence is paused, when the next email would have gone out, and lets you Resume Sequence if you want the automation to take over again.
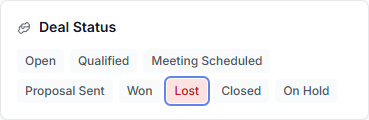
The Deal Status tags let you click to mark a conversation as Open, Qualified, Meeting Scheduled, Proposal Sent, Won, Lost, Closed, or On Hold. These are how you track pipeline value across conversations.
The Notes card lets you append timestamped notes to a conversation. Useful for capturing context that does not belong in an email but matters for your record.
Sending Accounts
Video tutorial 07 Sending Accounts & Warmup 1:28
Sending accounts are the mailboxes your campaigns send from. You can connect as many as you want, in any mix of providers.
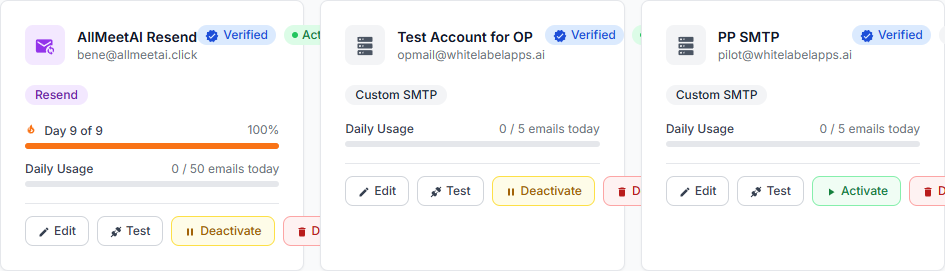
The Sending Accounts page shows every connected account with its provider, the from address, the daily limit, how many emails it has sent today, whether it has been verified, whether it is active, and where it is in its warmup cycle. From here you can add a new account or edit any existing one.
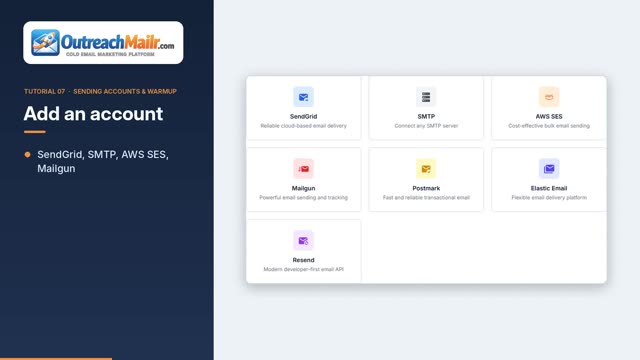
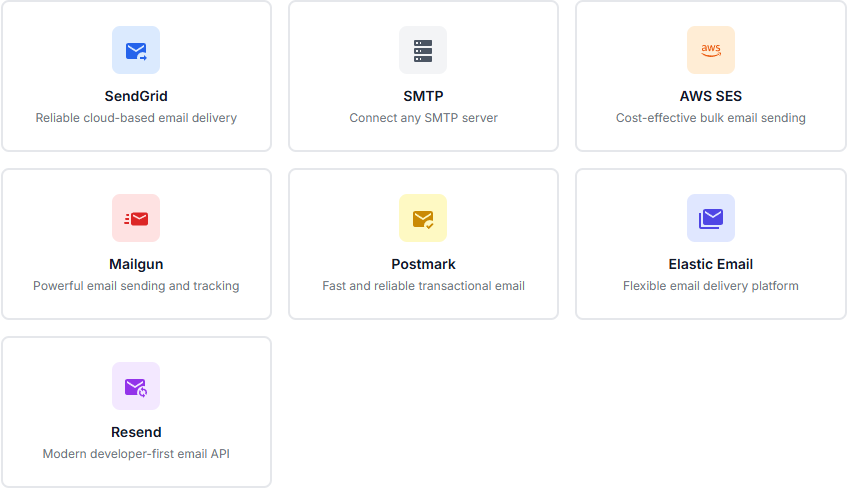
Click Add Sending Account to start the connection flow. You first pick the provider. The available options cover SendGrid, SMTP (any custom SMTP server), AWS SES, Mailgun, Postmark, Elastic Email, and Resend. Native Gmail API and Outlook integrations are also supported.
After picking a provider you fill in the credentials, set your daily and hourly sending limits, configure the from name, the from email, and an optional reply to address. Before you save, you can Test Connection to verify the credentials, and Send Test Email to any address you choose to confirm everything is working.
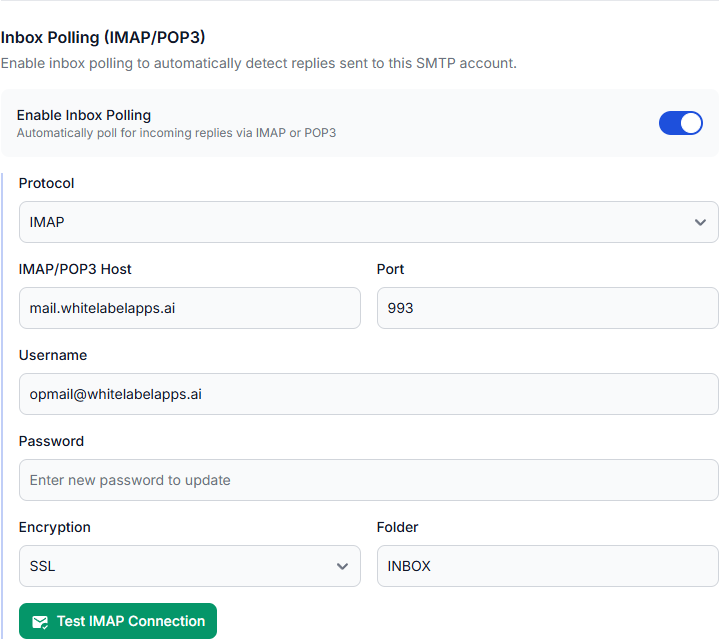
For SMTP, Gmail, and Outlook accounts, you can connect IMAP credentials so replies sent to your mailbox are automatically pulled into the inbox. Configure the host, port, username, password, encryption, protocol (IMAP or POP3), and which folder to poll. A Test IMAP Connection button verifies the connection before you save. The system also checks the spam and junk folders automatically, since cold outreach replies often land there.
For Resend accounts, inbound replies are fetched through Resend's own receiving API. You do not need to configure IMAP for those.
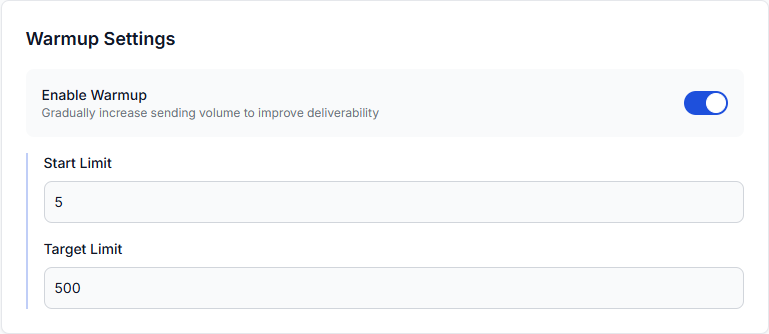
Each sending account can be enabled for warmup. You set a Start Limit and a Target Limit, and the system gradually ramps the daily sending volume up day by day until the target is reached. While warming up, the daily cap is automatically held at the current warmup limit so the account is not overloaded.
Tracking Domains
Video tutorial 08 Tracking Domains & Brand Voice 1:11
Tracking domains let you use a domain you own (for example track.yourcompany.com) for open tracking, click tracking, and unsubscribe links. This means prospects do not see a generic third party tracker in their email, and your sender reputation stays cleaner.
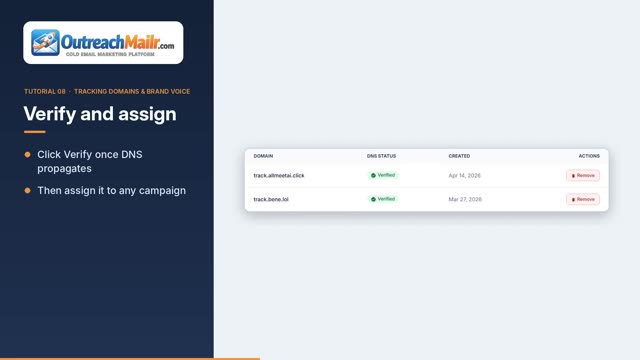
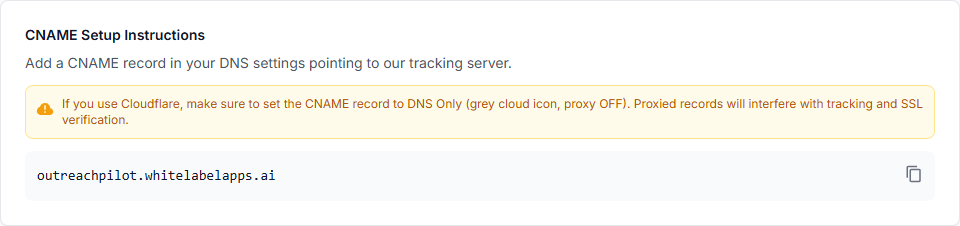
The setup is straightforward. Add the tracking domain you want to use, copy the CNAME target the page shows you, and add that CNAME record in the DNS settings of your domain registrar. Once the DNS change has propagated, click Verify and the system checks the record, provisions the domain on its end, and marks it ready.
Every tracking domain you have added is listed below with its DNS status and a quick way to delete it. Once a tracking domain is verified, you can assign it to any campaign so that the open pixel, click wrap, and unsubscribe link all use your own domain.
Brand Voice
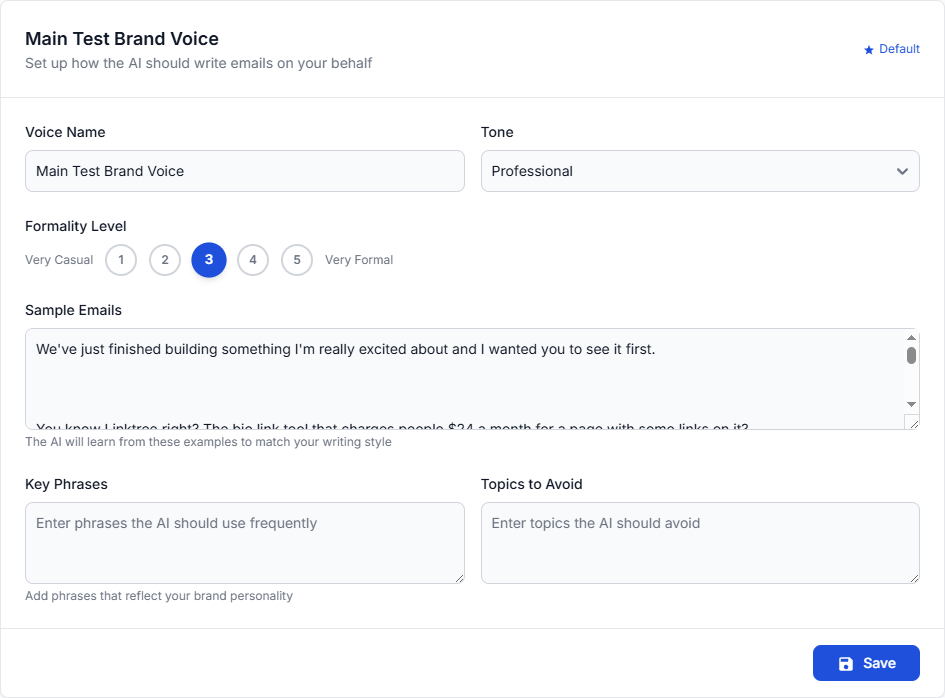
Brand voices teach the AI how you sound. You can create multiple brand voices, for example one for cold outreach and one for warm follow ups. Each campaign uses one brand voice, falling back to your default if you do not pick one explicitly.
When you edit a brand voice you can give it a name, a description, a tone, a formality level from 1 to 5, key phrases you frequently use, and topics you want to avoid. You can also paste sample emails as a writing style reference. The AI uses everything here as a guide when it writes personalized emails and reply drafts.
Analytics
Video tutorial 09 Analytics, the AI Decisions Log & Notifications 1:30
The account wide Analytics page rolls every campaign together so you can see your overall outreach performance. A date range selector at the top lets you switch between the last 7, 30, or 90 days, or pick a custom range.
The KPI cards along the top show Total Sent, Delivery Rate, Open Rate, Click Rate, Reply Rate, and Bounce Rate for the period. Trend indicators next to each metric show how it changed compared to the equivalent prior period.
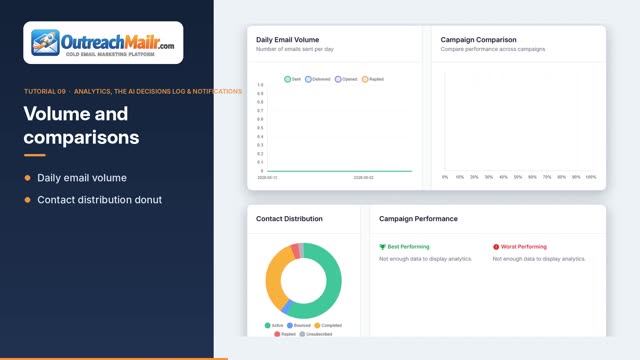
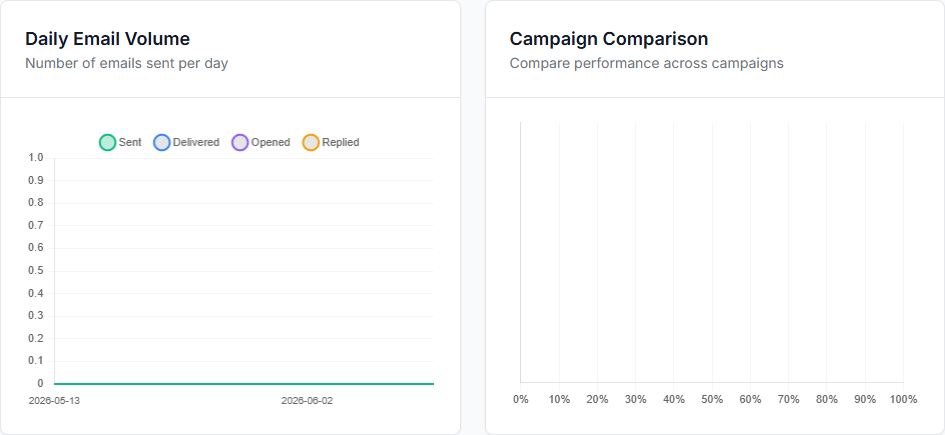
Below the cards, the daily email volume chart shows how many emails went out each day.
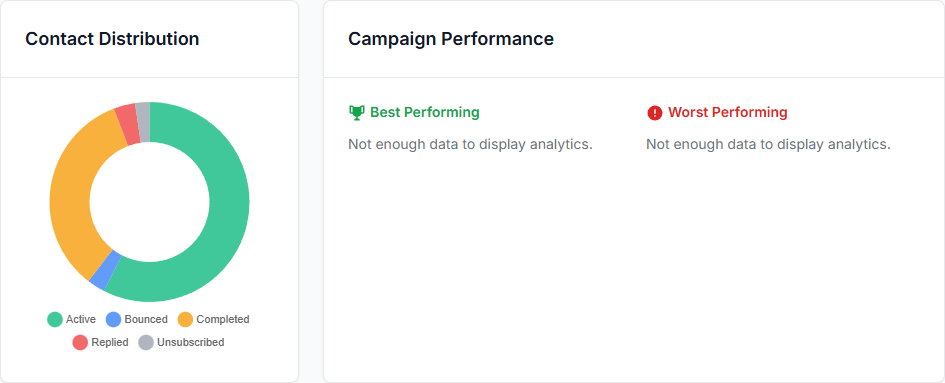
Further down, a contact distribution donut chart shows how your audience is split across lifecycle statuses, and tables rank your best and worst performing campaigns by reply rate.
AI Decisions Log
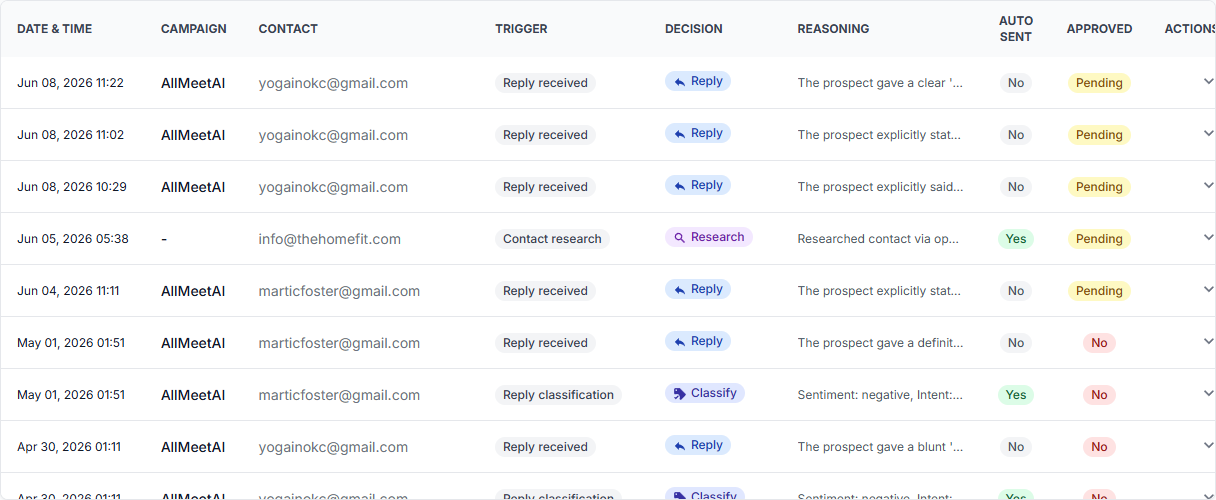
Every decision the AI makes on your behalf is logged. The AI Decision Log page is your full audit trail and your tool for understanding (or correcting) AI behavior over time.
A filter bar across the top lets you narrow the log by campaign, by date range, and by whether you only want to see decisions where the AI sent something automatically.
The table itself lists every decision with the date and time, the campaign, the contact, the trigger that caused the decision, the decision type, a short reasoning summary, and whether any feedback has been left on it.
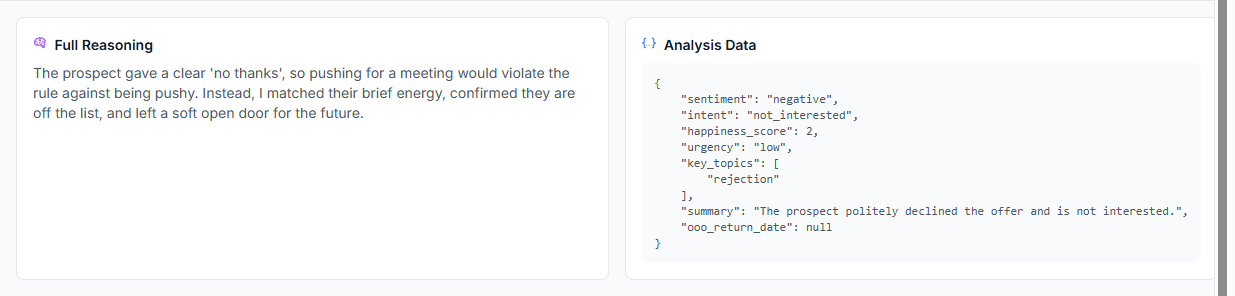
Click any row to expand it. The expanded view shows the AI's Full Reasoning in plain language alongside the structured Analysis Data the classifier produced (sentiment, intent, happiness score, urgency, key topics, and a summary). You can leave a thumbs up or thumbs down with a written note to help audit AI quality.
Notifications
The Notifications page is the central feed for everything important happening in your account. AI escalations, negative sentiment replies, unsubscribe requests, meeting requests, bounces, replies received, campaigns completed, and AI drafts ready for review all land here.
Switch between All Notifications and Unread Only using the tabs. Each item tells you the type, the message, when it happened, the campaign it belongs to, and which contact it involves. You can mark items as read one at a time or use the bulk action to mark everything read at once.
Settings
Video tutorial 10 Settings & AI Configuration 1:06
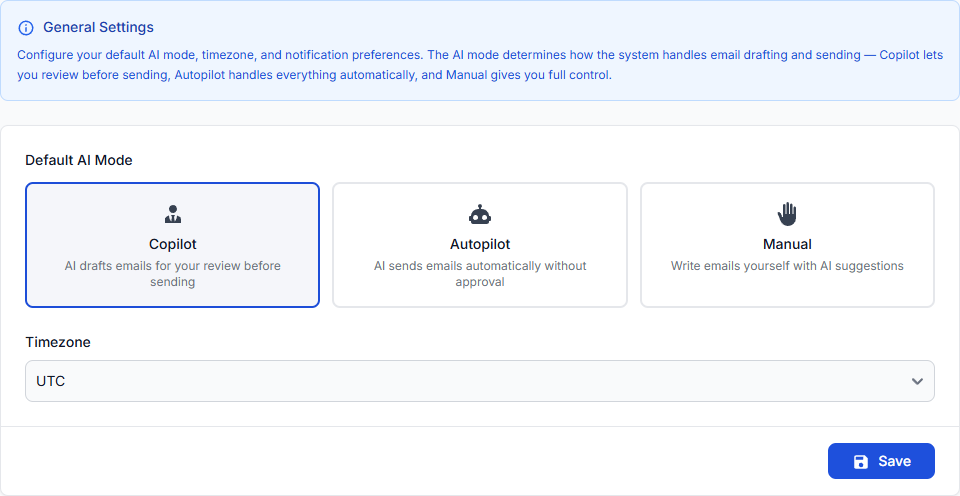
The Settings page controls account wide defaults that all your campaigns inherit. It has three tabs: General, Sending, and AI Settings.
Under General Settings you set your account timezone and the default AI mode (Autopilot, Hybrid, or Manual) that new campaigns will start with. You can override either of these on a per campaign basis later.
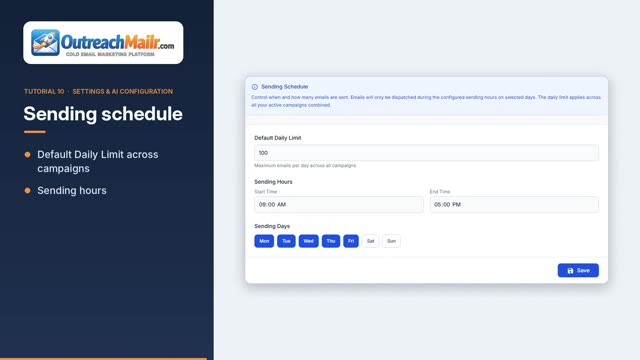
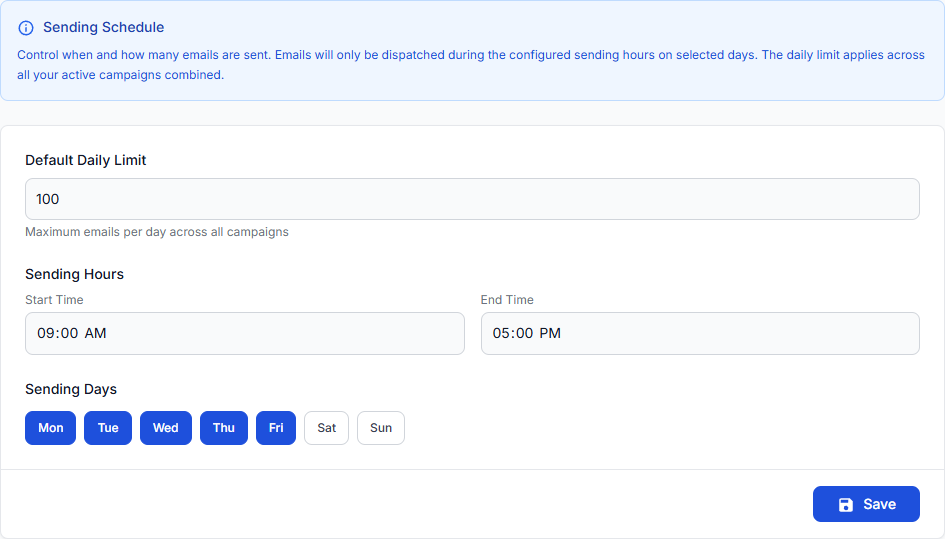
The Sending Schedule tab controls when emails are allowed to go out across every campaign you have. The Default Daily Limit caps the total volume across your active campaigns combined. The Sending Hours set the daily window, and the Sending Days selector lets you pick which days of the week are allowed.
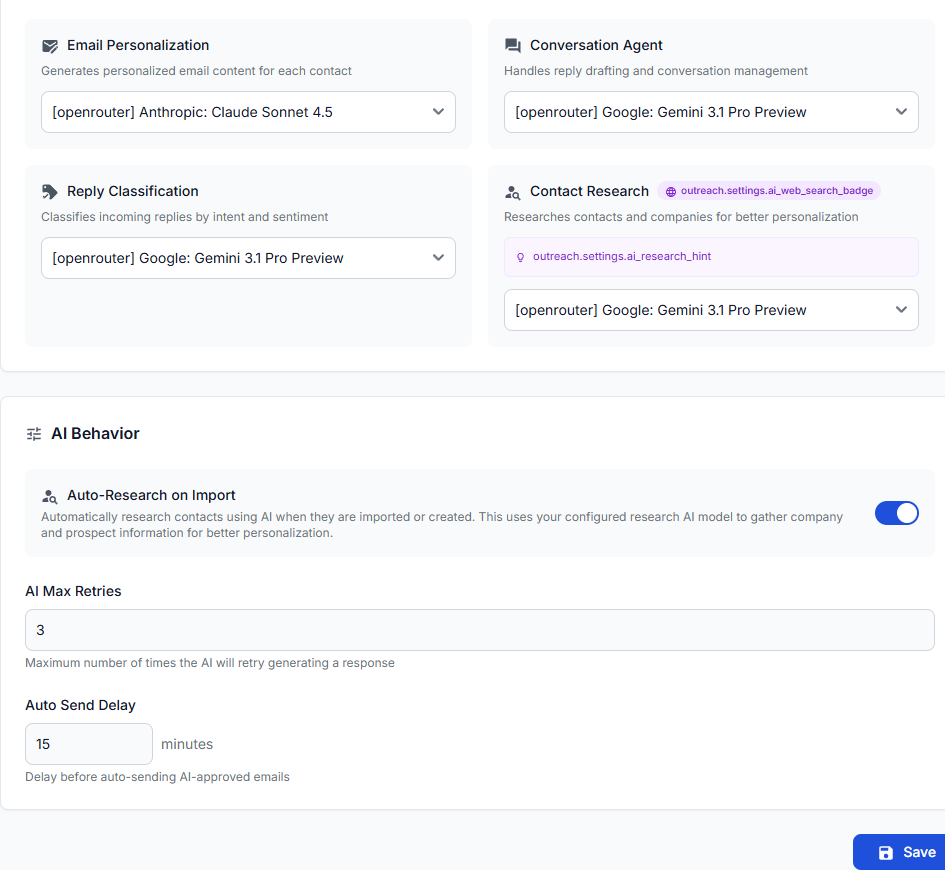
The AI Configuration tab lets you choose which AI model handles each function independently. Email Personalization writes the personalized outbound emails. Conversation Agent drafts reply responses on inbound replies. Reply Classification analyzes incoming replies for sentiment and intent. Contact Research performs deep web research on contacts when they are imported.
Different models have different strengths: faster models work well for classification, while more capable models are better for personalization and conversation. The available options come from your connected API key.
Below the model selectors, the AI Behavior panel controls broader behavior. Auto Research on Import, when enabled, kicks off AI research on every new contact you import without you doing anything. AI Max Retries sets how many times the AI will retry a failed call. Auto Send Delay is how long the system waits before auto sending AI approved emails.
Profile and Account
Video tutorial 11 Profile, Integrations & Interface Tips 1:36
Your profile page is where you manage your personal account information. To access it, click your name or avatar in the top-right corner of the header and select Profile from the dropdown menu.
The Profile Information section displays your account details.
Name - Your full name as it appears throughout the platform. You can change this at any time.
Email - Your email address. This field is read-only and cannot be changed from this page. If you need to update your email address, contact your administrator.
To update your name:
Click into the Name field.
Type your new name.
Click Save.
Your updated name will appear throughout the platform immediately.
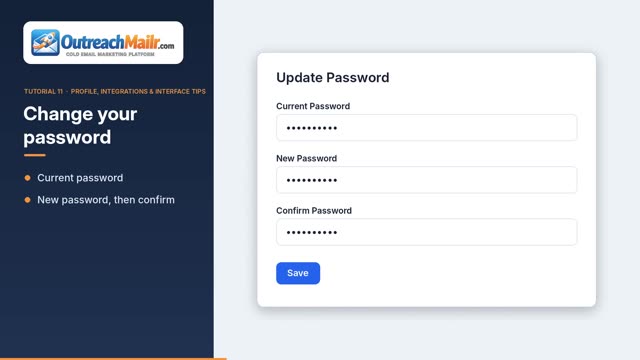
The Update Password section allows you to change your account password.
Enter your Current Password in the first field.
Enter your New Password in the second field.
Enter the new password again in the Confirm Password field.
Click Save.
If the passwords do not match or your current password is incorrect, an error message will appear explaining what needs to be corrected. After changing your password, you will remain logged in. Use your new password the next time you sign in.
Integrations
The Integrations page shows the third-party services that can be connected to your account. These integrations extend the functionality of the platform by linking it with external tools and services.
To access integrations, click Integrations in the sidebar.
The integrations page displays a grid of cards. Each card represents one integration and shows:
Name - The name of the service or tool.
Description - A brief explanation of what the integration does.
Status - Whether the integration is currently configured (shown as a green "Configured" badge) or not yet set up (shown as a gray "Not Configured" badge).
Some integrations may already be configured by your organization administrator. In that case, they will work automatically and you do not need to take any action.
If an integration requires your own credentials or API key:
Click the Configure button on the integration card.
A configuration form will open with fields specific to that integration. Typically, this involves entering an API key or other credentials provided by the third-party service.
Fill in the required fields. Required fields are marked with an asterisk (*).
You can click the eye icon next to credential fields to show or hide the value you entered.
Click Save to apply the configuration.
Once configured, the status badge on the integration card will change to "Configured" and the integration will be active.
If you need help finding your API key or credentials for a specific integration, click the Documentation link on the integration configuration page. This will open the third-party service's documentation in a new browser tab.
Custom Pages
Your administrator may have set up custom pages that appear in the sidebar. These provide additional resources, content, or links relevant to your account.
Some sidebar items link to external websites. When you click one of these links, you will be taken to the destination website. Depending on how the link was configured, it may open in the same browser tab or in a new tab.
External links are marked with a small arrow icon in the sidebar.
Other sidebar items open content pages directly within the platform. These pages can contain formatted text, images, embedded videos, forms, and other rich content created by your administrator.
To view an internal content page, simply click the link in the sidebar. The page content will load in the main content area.
Some links may only appear when you have a specific language selected. For example, you might see certain bonus content links only when the interface is set to English, and different links when set to French. This is managed by your administrator and happens automatically based on your language selection.
The language switcher allows you to change the interface language of the platform. It is located in the header bar, near the dark mode toggle.
Click the language switcher and select your preferred language from the list. The interface will update immediately. Changing the language only affects system text such as menus, buttons, and labels. It does not translate custom content created by your administrator.
The sidebar can be collapsed to give you more screen space. Click the collapse button at the bottom of the sidebar to switch to icon-only mode. Hover over any icon to see a tooltip with the menu item name. Click the button again to expand the sidebar. Your preference is saved automatically.
Frequently Asked Questions
I forgot my password
On the login page, click the Forgot Password link below the sign-in form. Enter your email address and click Send Reset Link. You will receive an email with a link to create a new password. If you do not see the email, check your spam or junk folder.
The platform looks different from what I expected
Your organization administrator controls the branding, colors, and theme of the platform. If the appearance seems incorrect or has changed unexpectedly, it may be due to a recent update by your administrator. Try refreshing the page or clearing your browser cache.
I cannot see a feature that was available before
Features and menu items can be enabled or disabled by your administrator. If something is missing from your sidebar or a page is no longer accessible, contact your administrator to check your account permissions.
How do I change my email address
Your email address cannot be changed from the profile page. Contact your administrator to update your email address.
How do I switch between light and dark mode
Click the sun or moon icon in the top-right area of the header bar. The platform will switch modes immediately and remember your preference for future sessions.
I received an error when configuring an integration
Double-check that you entered the correct API key or credentials. Make sure there are no extra spaces before or after the key. If the error persists, verify with the third-party service that your API key is active and has the necessary permissions. You can also click the Documentation link on the integration page for setup instructions from the service provider.